5.
Press ENTER. The LEDs will now
w
be lit according to how you placed
the DIP switches. If the
LEDs
match your original garage door
opener’s DIP switches, press
ENTER
again to store your code.
The green LED will light for three
seconds then the GDK will power
OFF. Your garage door code has
now been saved in the GDK’s
memory.
NOTE:
If you have made a mistake and
one or more of the
LEDs
are not matching
your DIP switches, use
the
4-
(STORE)
or
--+
(0) keys to move the blinking LED
to the DIP that was incorrectly set. Using
the UP, MID and DOWN keys, match the
remaining
LEDs
to the DIP switches on
your original garage door opener. Once
the
LEDs
march your original garage door
opener’s DIP switches, press ENTER to
store your code.
6.
Now test your GDK. Press any key
other than EXIT, your garage door
should open.
7.
Repeat steps 1
-
5
to add a
second or third garage door to the
memory of the GDK,
IMPORTANT: With some Sears Craftsman
model transmitters, the
DIP
switch
numbering begins with the number
"2.”
When programming the GDK to Operate
one of these models, please use the
DIP
(near the head unit) rather than the DIP
switches inside your original Transmitter.
The radio receiver can be found on or near
the garage door opener motor head
mounted on
your
garage ceiling. The DIP
switches are usually located near the point
where the electrical wires enter the garage
door opener head or on the externally
mounted radio receiver.
Some Genie openers do not have DIP
switches. They have “knockout” or “punch
out” switches to set the transmitter code.
Where the hole is “punched out” on the
original transmitter, the GDK’s
LEDs
should be set in the DOWN position
(OFF). Where the hole is NOT “punched
out”, the GDK’s
LEDs should be set in the
UP position (ON). On these models, the
GDK’s
LEDs
(I-9) should never be in the
MIDDLE position (BLINKING).
If you own a Genie AR85 Garage Door
Opener, do not set LED number 9 in the
UP position (ON).
If you own a Genie AR90 Garage Door
Opener, do not set more than eight
LEDs
(out of 12) in the UP position (ON).
If the GDK will not operate your Stanley
opener, try setting the
LEDs (1-10) to the
opposite positions of your original
transmitter. For example, if you set all 10
of
the LEDs to the UP position (ON) to
match your original Stanley transmitter,
then reverse the LEDs to the DOWN
position (OFF) and test the GDK again.
Some Stanley openers do not have
DIP
switches. They have even numbered wires
located in both the original transmitter
and the head unit. Notice that
there
are no
odd numbered wires. To program the GDK
to operate one of these wired units:
Place all of the
LEDs
(1-12) in the
GDK in the down position (OFF).
Now locate the uncut wires in the
original transmitter or head unit
and, using the
+-
(STORE) or
--)
(0) keys on the GDK, move
the blinking LED to the first
number that matches the first
uncut wire in your original
transmitter. Using the UP key,
place the LED in the UP position
(ON). Continue to place all of the
uncut wires in the UP position
(ON). On these models, the GDK’s
LEDs
(1-9) should never be in the
MIDDLE position (BLINKING).
If your "Smart" or “Learning” garage
door opener has DIP switches in the
original transmitter, set the
#1
LED
on the GDK to the opposite setting of
the
#1
DIP switch in your original
transmitter. Set the remaining
LEDs
(2-9) to the exact same position as
your original transmitter.
If
your
original transmitter does not have
DIP switches, continue on to Step 2.
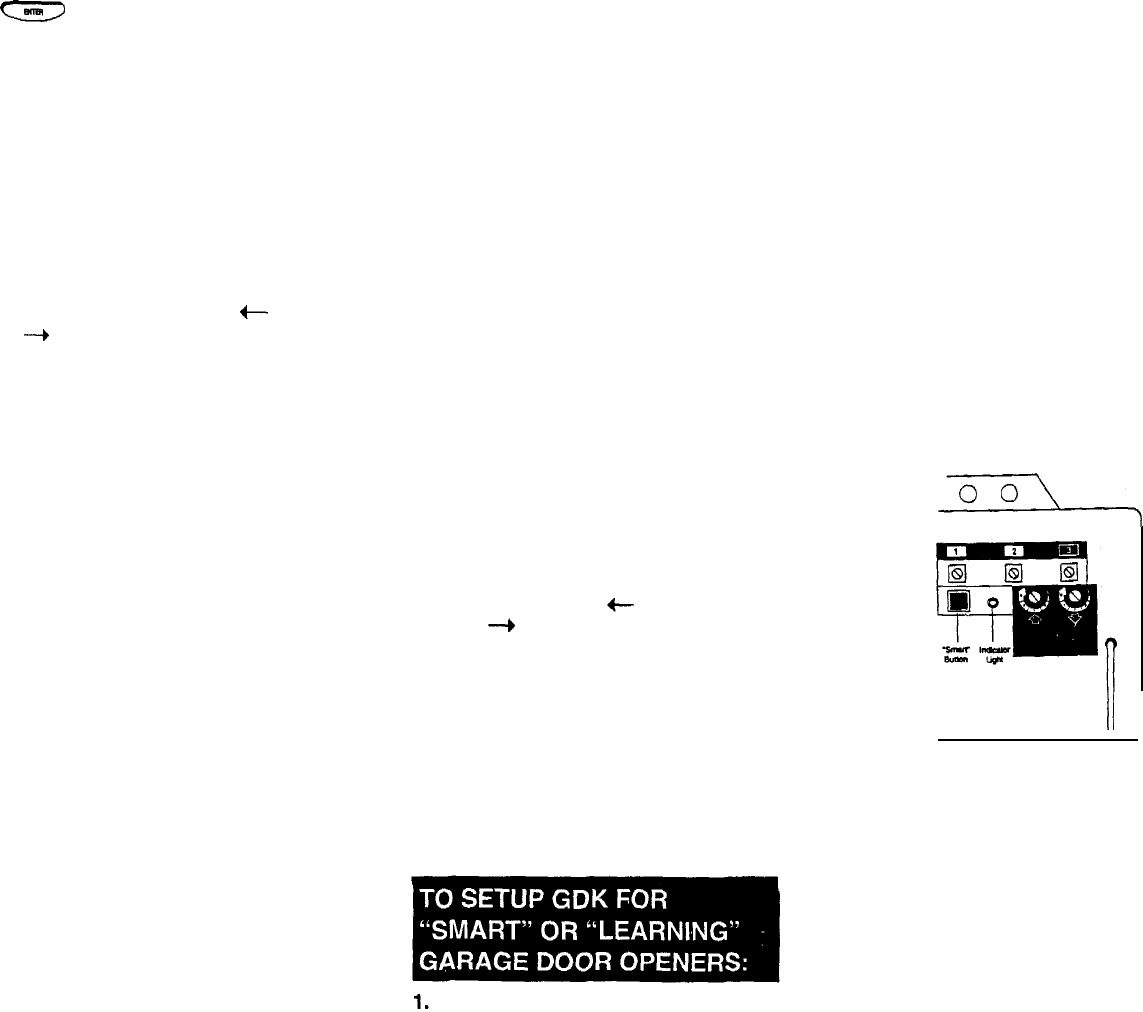
2.
3.
4.
5.
Reach the motor head unit and
remove the plastic cover. Find the
“Smart” or “Learn” button on the head
unit. The button should have an LED
(Light Emitting Diode) next to it.
After setting the manufacturer’s code,
set the
LEDs
on the GDK to any
position you like, and store the
code to DOOR1, DOOR2 or DOOR3
as described in the “SETTING UP
THE SECURITY CODE TO
OPERATE YOUR GARAGE DOOR”
section.
Press and hold the button on your
GDK where you stored your code.
While holding down that button,
press
the “Smart” or “Learn“ button,
see Figure 5 (below), on the head
unit. After the light on the head unit
flashes, release both buttons.
oo’i
END PANEL
i/
I
II J
Test the GDK by pressing any
button other than EXIT. Your garage
door should respond.
Please Note: You
have now added
the
access code of your GDK to the radio
receiver. However, your original
transmitter may nor be able to
communicate wirh
the
opener. If this is
the case, erase
the
memory of your radio
receiver by pressing and holding the
“Smart” or “Learn” button on the head unit
for approximately 10 seconds. Now,
relearn your original transmitter by
pressing and holding the button on your
original transmitter. While holding down
that button, press the “Smart” or “Learn”
button on
the
head unit. After
the
light on
the head unit flashes, release both
buttons. Then, relearn the GDK.
If
this fails
to
make both transmitters compatible with
your garage door opener, then erase the
memory of your radio receiver and relearn
the
original transmitter and march the
GDK’s LEDs to the D/P switches in the
original transmitter.
Smarthome.com, Inc. (800) SMART-HOME (949) 221-9200 http://smarthome.com

 (26 pages)
 Manymanuals.com
 Manymanuals.de
 Manymanuals.fr
 Manymanuals.it
 Manymanuals.pl
 Manymanuals.cz
 Manymanuals.es
 Manymanuals-pt.com
Comments to this Manuals